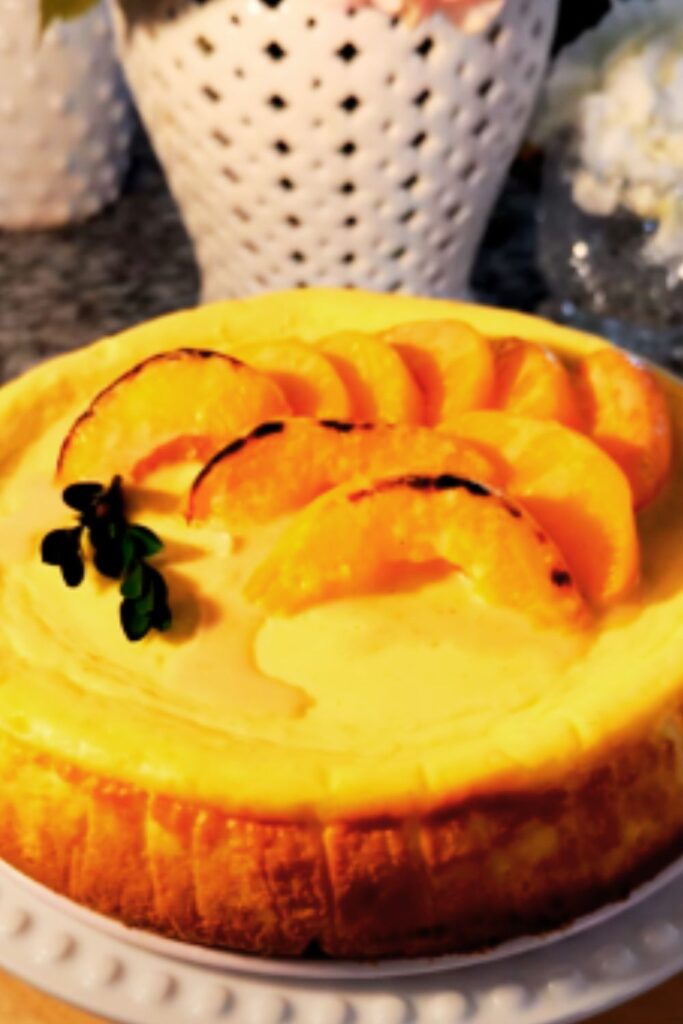
There’s something magical about the combination of sweet, juicy peaches and creamy cheesecake that makes my taste buds dance with joy. When summer’s bounty of fresh peaches arrives, I can’t resist turning them into these decadent Peaches and Cream Cheesecake Bars. This delightful dessert features a buttery graham cracker crust topped with a velvety cheesecake layer and crowned with glazed peach slices that practically melt in your mouth.
The Perfect Summer Dessert
I’ve been perfecting this recipe for years, and it’s become my go-to dessert for summer gatherings. These bars strike the perfect balance between the tangy richness of cheesecake and the sweet, aromatic flavor of ripe peaches. The best part? They’re much easier to make than a traditional cheesecake and can be cut into convenient bars for serving.
Whether you’re hosting a backyard barbecue, attending a potluck, or simply treating yourself to something special, these Peaches and Cream Cheesecake Bars will not disappoint. Let me walk you through how to create this showstopper dessert that celebrates the beautiful marriage of peaches and cream.
Ingredients You’ll Need
For the Crust:
- 2 cups graham cracker crumbs (about 16 full sheets)
- 1/4 cup granulated sugar
- 1/2 cup unsalted butter, melted
- 1/2 teaspoon ground cinnamon
- Pinch of salt
For the Cheesecake Filling:
- 3 packages (8 oz each) cream cheese, softened to room temperature
- 1 cup granulated sugar
- 3 large eggs, at room temperature
- 2 teaspoons vanilla extract
- 1/4 cup sour cream
- 2 tablespoons all-purpose flour
For the Peach Topping:
- 4-5 ripe peaches, peeled and sliced (about 4 cups)
- 1/3 cup granulated sugar
- 2 tablespoons fresh lemon juice
- 1/4 cup water
- 2 tablespoons cornstarch
- 1/2 teaspoon ground cinnamon
- 1/4 teaspoon ground nutmeg
Nutritional Information
I believe in transparency when it comes to what we eat, so here’s a detailed breakdown of the nutritional content per serving (based on 16 bars):
| Nutrient | Amount | % Daily Value |
|---|---|---|
| Calories | 325 | – |
| Total Fat | 21g | 27% |
| Saturated Fat | 12g | 60% |
| Cholesterol | 95mg | 32% |
| Sodium | 230mg | 10% |
| Total Carbohydrates | 32g | 12% |
| Dietary Fiber | 1g | 4% |
| Sugars | 24g | – |
| Protein | 5g | 10% |
| Calcium | 80mg | 6% |
| Iron | 1mg | 6% |
| Potassium | 170mg | 4% |
| Vitamin A | 800IU | 16% |
| Vitamin C | 5mg | 6% |
Values are approximate and may vary based on specific ingredients used.
Step-by-Step Instructions
Preparing the Crust
- Preheat your oven to 325°F (165°C). Line a 9×13-inch baking pan with parchment paper, leaving some overhang on the sides for easy removal later.
- In a medium bowl, combine the graham cracker crumbs, sugar, melted butter, cinnamon, and salt. Mix until the mixture resembles wet sand.
- Press the mixture firmly and evenly into the bottom of the prepared pan. I find using the bottom of a measuring cup helps create a smooth, even surface.
- Bake the crust for 10 minutes, then remove from the oven and let cool slightly while preparing the filling. Keep the oven on.
Making the Cheesecake Filling
- In the bowl of a stand mixer fitted with the paddle attachment (or in a large bowl using a hand mixer), beat the cream cheese on medium-low speed until smooth and creamy, about 2 minutes.
- Add the sugar and beat for another 1-2 minutes until well combined.
- Add the eggs one at a time, beating well after each addition and scraping down the sides of the bowl as needed.
- Mix in the vanilla extract and sour cream until just combined.
- Sprinkle the flour over the mixture and beat on low speed just until incorporated. Be careful not to overmix.
- Pour the cheesecake filling over the cooled crust and spread it into an even layer.
- Bake for 35-40 minutes, or until the edges are set but the center still has a slight jiggle.
- Turn off the oven, crack the door open, and let the cheesecake cool in the oven for about 30 minutes. This gradual cooling helps prevent cracks.
- Remove from the oven and let cool completely at room temperature, then refrigerate for at least 3 hours or preferably overnight.
Preparing the Peach Topping
- In a medium saucepan, combine the sliced peaches, sugar, and lemon juice. Cook over medium heat for about 5 minutes, until the peaches begin to soften and release their juices.
- In a small bowl, whisk together the water and cornstarch until smooth.
- Pour the cornstarch mixture into the peach mixture, stirring constantly.
- Add the cinnamon and nutmeg, then continue to cook, stirring frequently, until the mixture thickens and becomes glossy, about 2-3 minutes.
- Remove from heat and let cool completely.
- Once the cheesecake and peach topping are both completely cooled, spread the peach topping evenly over the cheesecake layer.
- Return to the refrigerator for at least 1 hour before serving to allow the topping to set.

Tips for Perfect Peaches and Cream Cheesecake Bars
Selecting the Perfect Peaches
The star of this dessert is undoubtedly the peaches, so choosing the right ones is crucial:
- Look for peaches that yield slightly to gentle pressure but aren’t mushy
- Fragrant peaches are typically more flavorful – don’t be afraid to give them a sniff!
- For the best flavor, use peaches at the peak of ripeness
- If your peaches aren’t quite ripe, place them in a paper bag at room temperature for 1-2 days
- Yellow peaches tend to have more traditional “peachy” flavor, while white peaches are sweeter and less acidic
Make-Ahead Options
One of the things I love about this recipe is how well it works as a make-ahead dessert:
- The cheesecake bars (without the peach topping) can be made up to 3 days in advance and stored in the refrigerator
- The peach topping can be made up to 2 days ahead and stored separately in the refrigerator
- Completely assembled bars can be stored in the refrigerator for up to 3 days
- For longer storage, freeze the bars (without the peach topping) for up to 2 months, then thaw overnight in the refrigerator before adding the topping
Seasonal Variations
While fresh summer peaches are ideal for this recipe, I’ve developed some delicious variations for when they’re not in season:
Using Canned or Frozen Peaches
When fresh peaches aren’t available, you can substitute:
- 4 cups drained canned peaches (in juice, not syrup)
- 4 cups thawed frozen peach slices
If using either of these options:
- Drain thoroughly to remove excess liquid
- If using canned peaches, reduce the sugar in the topping to 1/4 cup
- For frozen peaches, pat them dry with paper towels after thawing to remove excess moisture
Other Fruit Variations
This versatile cheesecake bar recipe works wonderfully with other fruits as well:
- Substitute fresh berries (strawberries, blueberries, raspberries) for a berry cheesecake bar
- Try thinly sliced apples with extra cinnamon for a fall-inspired version
- Pears poached in a bit of honey make an elegant variation
Common Troubleshooting
Even experienced bakers encounter challenges sometimes. Here are solutions to common issues:
Preventing Cracks in Your Cheesecake
To achieve that perfect, smooth cheesecake surface:
- Ensure all ingredients are at room temperature before mixing
- Avoid overmixing, especially after adding the eggs
- Bake at a moderate temperature (325°F instead of 350°F)
- Use a water bath for extra insurance against cracks (place the pan in a larger pan filled with about 1 inch of hot water)
- Allow the cheesecake to cool gradually in the oven with the door cracked
Fixing a Runny Peach Topping
If your peach topping doesn’t thicken properly:
- Mix an additional 1 tablespoon cornstarch with 2 tablespoons cold water
- Return the peach mixture to a simmer and stir in the additional cornstarch slurry
- Cook for 1-2 minutes until thickened

Serving Suggestions
These Peaches and Cream Cheesecake Bars are absolutely delicious on their own, but here are some of my favorite ways to elevate them:
- Top with a dollop of freshly whipped cream
- Serve with a small scoop of vanilla bean ice cream
- Drizzle with a bit of honey or maple syrup
- Garnish with mint leaves for a pop of color
- Pair with a cup of hot coffee or tea
- Add a sprinkle of chopped toasted pecans or almonds for crunch
- Serve with a side of additional fresh peach slices
Storage Instructions
Proper storage ensures these bars remain delicious for days:
| Storage Method | Maximum Time | Instructions |
|---|---|---|
| Refrigerator (uncut) | 5 days | Cover tightly with plastic wrap |
| Refrigerator (cut into bars) | 3-4 days | Store in airtight container with layers separated by parchment |
| Freezer (without topping) | 2 months | Wrap individual pieces in plastic, then foil; place in freezer bag |
| Freezer (with topping) | 1 month | Freeze uncovered until solid, then wrap individually |
| Room temperature | 2 hours maximum | Not recommended for longer storage |
Always bring refrigerated bars to room temperature for about 15-20 minutes before serving for the best flavor and texture.
Special Dietary Adaptations
I believe everyone should be able to enjoy these delicious bars, so here are some adaptations for various dietary needs:
Gluten-Free Version
- Replace graham crackers with gluten-free graham crackers or cookies
- Substitute the all-purpose flour in the filling with cornstarch or gluten-free flour blend
Lower-Sugar Option
- Reduce sugar in the crust to 2 tablespoons
- Use 3/4 cup sugar in the filling instead of 1 cup
- For the peach topping, substitute half the sugar with a natural sweetener like stevia or monk fruit
Dairy-Free Alternative
- Use dairy-free cream cheese substitute
- Replace butter with coconut oil in the crust
- Substitute sour cream with dairy-free yogurt
Q&A Section
Q: Can I use nectarines instead of peaches? Absolutely! Nectarines work beautifully in this recipe as a 1:1 substitute for peaches. Since nectarines don’t have fuzzy skin, you can skip the peeling step, which is a nice time-saver.
Q: How do I know when the cheesecake layer is properly baked? The edges should be set and slightly puffed, while the center should still have a slight jiggle (like Jell-O). If you gently shake the pan, the center 2-3 inches should wobble slightly. It will continue to set as it cools.
Q: My peaches aren’t very sweet. Should I add more sugar? Yes, feel free to adjust the sugar in the peach topping based on the sweetness of your fruit. Taste the mixture after the peaches have released some juice, and add an extra tablespoon or two of sugar if needed.
Q: Can I make these in a smaller pan for a thicker cheesecake? Yes! You can use a 9×9-inch pan for thicker bars. Increase the baking time by about 10-15 minutes and look for the same visual cues for doneness (set edges, slightly jiggly center).
Q: How do I get clean cuts when slicing the bars? For professional-looking cuts, chill the bars thoroughly, then dip a large sharp knife in hot water, wipe it dry, and make a clean cut. Repeat the dipping and drying process for each cut.
Q: Can I make mini cheesecake bars in a muffin tin? Definitely! Line a muffin tin with paper liners, press about 1 tablespoon of crust mixture into each, and reduce the baking time to about 20-25 minutes. The recipe should yield about 24 mini cheesecake bars.
The History Behind the Recipe
I first developed this recipe during a particularly abundant peach season when I found myself with more fresh peaches than I knew what to do with. While traditional peach pie and cobbler are delicious, I wanted something a bit more special—something that combined my love for creamy cheesecake with the beautiful summer peaches piled high in my kitchen.
After several attempts and refinements, these Peaches and Cream Cheesecake Bars became a family favorite. The recipe has been shared at countless gatherings, and I’ve passed it along to friends and family who invariably report back with rave reviews.
What makes this dessert so special is the beautiful contrast between the tangy, rich cheesecake layer and the sweet, aromatic peach topping. The graham cracker crust provides the perfect crisp foundation that ties it all together.
Final Thoughts
There’s something deeply satisfying about transforming simple ingredients into something truly spectacular. These Peaches and Cream Cheesecake Bars represent the best of summer indulgence—the kind of dessert that creates memories and becomes part of your personal recipe collection.
I hope you’ll try these bars the next time you have ripe peaches on hand. Whether you’re making them for a special occasion or just because it’s Tuesday, they’re sure to bring a little sweetness to your day. And remember, while following the recipe is important, don’t be afraid to make it your own. The best recipes evolve as they’re passed along, each baker adding their own special touch.
Happy baking!