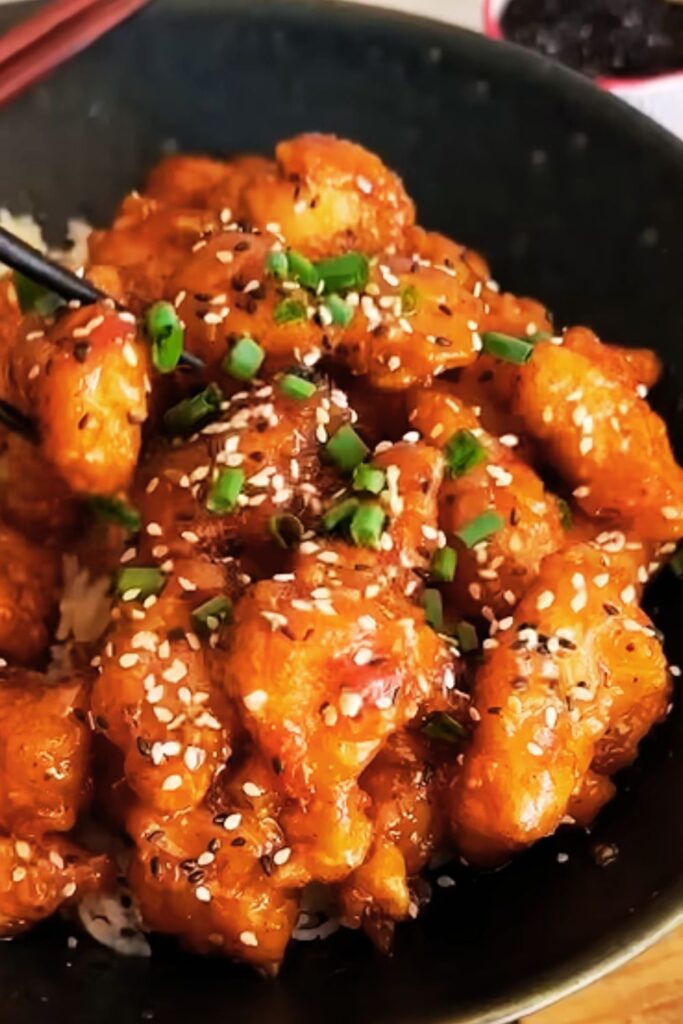
There’s something magical about the combination of sweet honey and pungent garlic that makes my taste buds dance. I’ve been perfecting my Honey Garlic Chicken Bites recipe for years, and I’m thrilled to finally share it with you today. These irresistible morsels of chicken are crispy on the outside, tender on the inside, and coated in a sticky, flavor-packed sauce that will have everyone at your table asking for seconds.
What I love most about this recipe is how versatile it is. You can serve these bites as an appetizer at your next gathering, toss them into a stir-fry, or make them the star of your weeknight dinner alongside some steamed rice and vegetables. The best part? You’ll only need about 30 minutes from start to finish, making this the perfect solution for those busy evenings when you want something delicious without spending hours in the kitchen.
Why You’ll Love This Recipe
Before we dive into the details, let me tell you why this recipe has become a staple in my household:
- Quick and efficient: From prep to plate in just 30 minutes
- Budget-friendly: Uses simple ingredients that won’t break the bank
- Kid-approved: The sweet and savory flavor is a hit with even the pickiest eaters
- Meal-prep star: Makes excellent leftovers for lunch the next day
- Versatile: Works as an appetizer, main dish, or even in salads
- Customizable: Easy to adjust the heat level to suit your preference
If you’ve ever ordered honey garlic chicken from your local takeout spot and wished you could recreate that magic at home, you’re in for a treat. My version is healthier, more flavorful, and surprisingly simple to make.
The Secret to Perfect Honey Garlic Chicken Bites
What sets this recipe apart from others you might have tried is the double-coating technique. By dredging the chicken twice—first in cornstarch and then in a light batter—you’ll achieve that restaurant-quality crispiness that holds up even after being tossed in the sticky sauce.
Another game-changer is the sauce itself. While many recipes call for just honey and garlic, I’ve found that adding a few extra ingredients creates a more complex flavor profile that transforms these chicken bites from good to absolutely irresistible.
Let’s get cooking, shall we?
Ingredients
For the Chicken Bites:
- 1.5 pounds (680g) boneless, skinless chicken breasts or thighs, cut into 1-inch cubes
- 1 cup (120g) cornstarch
- 1/2 teaspoon salt
- 1/4 teaspoon black pepper
- 2 large eggs, beaten
- 1/4 cup (60ml) milk
- 1 cup (125g) all-purpose flour
- 1 teaspoon garlic powder
- 1 teaspoon onion powder
- 1/2 teaspoon paprika
- Vegetable oil for frying (about 2-3 cups)
For the Honey Garlic Sauce:
- 1/2 cup (120ml) honey
- 1/3 cup (80ml) soy sauce (low-sodium preferred)
- 6 cloves garlic, minced (about 2 tablespoons)
- 1 tablespoon rice vinegar
- 1 tablespoon toasted sesame oil
- 2 tablespoons brown sugar
- 1 tablespoon cornstarch
- 2 tablespoons water
- 1/2 teaspoon red pepper flakes (adjust to taste)
- 1 tablespoon fresh ginger, grated
For Garnish:
- 2 green onions, thinly sliced
- 1 tablespoon toasted sesame seeds
- Fresh cilantro leaves (optional)
Nutritional Information Per Serving
I believe in transparency when it comes to what goes into our bodies, so here’s a breakdown of the nutritional content for one serving (approximately 1/4 of the recipe):
| Nutrient | Amount | % Daily Value* |
|---|---|---|
| Calories | 420 | – |
| Total Fat | 15g | 19% |
| Saturated Fat | 3g | 15% |
| Trans Fat | 0g | – |
| Cholesterol | 145mg | 48% |
| Sodium | 980mg | 43% |
| Total Carbohydrates | 42g | 15% |
| Dietary Fiber | 1g | 4% |
| Sugars | 24g | – |
| Protein | 30g | 60% |
| Vitamin D | 0.2mcg | 1% |
| Calcium | 40mg | 3% |
| Iron | 1.8mg | 10% |
| Potassium | 450mg | 10% |
*Percent Daily Values are based on a 2,000 calorie diet.
Equipment Needed
Before we start cooking, let’s make sure you have everything you need:
- Large mixing bowls (at least 3)
- Whisk
- Measuring cups and spoons
- Sharp knife and cutting board
- Deep, heavy-bottomed pan or wok for frying
- Thermometer (optional but helpful for frying)
- Slotted spoon or spider strainer
- Paper towel-lined plate
- Medium saucepan for the sauce
- Tongs
- Large mixing spoon

Step-by-Step Instructions
Preparing the Chicken:
- Prep the chicken: Pat the chicken pieces dry with paper towels. This is crucial for getting a good cornstarch coating. Cut into 1-inch cubes, aiming for uniform size to ensure even cooking.
- Create your dredging station: Set up three separate bowls.
- In the first bowl, mix cornstarch, salt, and pepper.
- In the second bowl, whisk together eggs and milk.
- In the third bowl, combine flour, garlic powder, onion powder, and paprika.
- Dredge the chicken:
- Working in batches, toss the chicken pieces in the cornstarch mixture until fully coated.
- Dip each piece into the egg mixture.
- Finally, coat in the seasoned flour mixture, pressing gently to ensure the coating adheres well.
- Place the coated chicken on a plate and let it sit for 5 minutes. This resting time helps the coating stick better during frying.
Frying the Chicken:
- Heat the oil: In a deep, heavy-bottomed pan or wok, heat oil to 350°F (175°C). If you don’t have a thermometer, you can test the oil by dropping a small piece of bread into it—if it sizzles and turns golden in about 30 seconds, your oil is ready.
- Fry in batches: Carefully add the coated chicken pieces to the hot oil, working in batches to avoid overcrowding (which would lower the oil temperature and result in soggy chicken).
- Cook until golden: Fry each batch for about 3-4 minutes, turning occasionally, until the chicken is golden brown and crispy on all sides. The internal temperature should reach 165°F (74°C).
- Drain: Using a slotted spoon or spider strainer, transfer the fried chicken to a paper towel-lined plate to drain excess oil.
Making the Honey Garlic Sauce:
- Create a cornstarch slurry: In a small bowl, mix 1 tablespoon cornstarch with 2 tablespoons water until smooth.
- Combine sauce ingredients: In a medium saucepan over medium heat, add honey, soy sauce, minced garlic, rice vinegar, sesame oil, brown sugar, grated ginger, and red pepper flakes. Stir to combine.
- Bring to a simmer: Allow the mixture to come to a gentle simmer for about 2 minutes, stirring occasionally.
- Thicken the sauce: Slowly whisk in the cornstarch slurry and continue to cook, stirring constantly, until the sauce thickens enough to coat the back of a spoon (about 1-2 minutes).
Putting It All Together:
- Coat the chicken: Add the fried chicken bites to the sauce and toss gently to coat each piece evenly. If your saucepan isn’t large enough, you can transfer both the sauce and chicken to a large bowl for easier tossing.
- Garnish: Transfer the honey garlic chicken bites to a serving plate and sprinkle with sliced green onions, toasted sesame seeds, and cilantro leaves if using.
Tips for Success
After making this recipe countless times, I’ve gathered some valuable insights that can help you achieve the best results:
- Cut chicken uniformly: Even-sized pieces will cook at the same rate, ensuring nothing is overcooked or undercooked.
- Don’t skip the resting time: Letting the coated chicken sit for 5 minutes before frying helps the coating adhere better during cooking.
- Monitor oil temperature: If the oil is too hot, the coating will burn before the chicken cooks through. If it’s too cool, the chicken will absorb too much oil and become greasy.
- Make the sauce in advance: You can prepare the sauce up to 3 days ahead and store it in the refrigerator. This makes the final assembly much quicker.
- Test a single piece first: Before frying the entire batch, cook one piece to check if your oil temperature is correct and if the coating adheres well.
- Keep it warm: If you’re not serving immediately, keep the coated chicken bites warm in a 200°F (95°C) oven until ready to serve. Add the sauce just before serving to maintain crispiness.
Variations to Try
One of the reasons I love this recipe is how easily it can be customized. Here are some delicious variations I’ve tried over the years:
Spicy Honey Garlic Chicken Bites
- Add 1-2 tablespoons of sriracha or 1 tablespoon of gochujang to the sauce
- Increase red pepper flakes to 1 teaspoon
- Garnish with thinly sliced fresh chili peppers
Lemon Honey Garlic Chicken
- Add the zest and juice of one lemon to the sauce
- Reduce honey to 1/3 cup
- Add 1 teaspoon of lemon pepper seasoning to the flour mixture
Orange Honey Garlic Chicken
- Add 1/4 cup of orange juice and the zest of one orange to the sauce
- Reduce the honey to 1/3 cup
- Include 1/2 teaspoon of five-spice powder in the sauce
Pineapple Honey Garlic Chicken
- Add 1/4 cup of pineapple juice to the sauce
- Fold in 1/2 cup of small pineapple chunks after coating the chicken in the sauce
- Garnish with a few extra pineapple pieces
Make-Ahead and Storage Instructions
Life gets busy, and I’m all about making things easier without sacrificing flavor. Here’s how you can work this recipe into your meal prep routine:
Make-Ahead Options:
- Prep the chicken: Cut and coat the chicken up to 4 hours ahead, storing it covered in the refrigerator until ready to fry.
- Pre-make the sauce: The honey garlic sauce can be made up to 3 days in advance and stored in an airtight container in the refrigerator.
- Complete meal prep: Fry the chicken without the sauce, allow it to cool completely, then store in an airtight container in the refrigerator. When ready to serve, reheat the chicken in a 350°F (175°C) oven for 10-15 minutes until crispy again, then toss with the warmed sauce.
Storage Guidelines:
- Refrigeration: Store leftovers in an airtight container for up to 3 days. Note that the chicken won’t stay as crispy once refrigerated with the sauce.
- Freezing: For best results, freeze the fried chicken without the sauce. Place cooled chicken pieces on a baking sheet in a single layer and freeze until solid, then transfer to a freezer bag. Store for up to 2 months. The sauce can be frozen separately in an airtight container.
- Reheating: For the crispiest results, reheat the chicken in an oven at 350°F (175°C) for 10-15 minutes. If frozen, add an additional 5-10 minutes. Thaw and reheat the sauce separately, then combine.
Serving Suggestions
These honey garlic chicken bites are incredibly versatile when it comes to serving options. Here are some of my favorite ways to enjoy them:
As a Main Dish:
- Classic Asian-inspired meal: Serve over steamed jasmine rice with stir-fried vegetables like broccoli, bell peppers, and snap peas.
- Grain bowl: Create a nutritious bowl with quinoa or brown rice, steamed edamame, shredded carrots, cucumber, and avocado.
- Noodle dish: Toss with cooked lo mein or udon noodles, sautéed vegetables, and extra sauce.
- Lettuce wraps: Serve in butter lettuce cups with shredded carrots, cucumber sticks, and a drizzle of sriracha mayonnaise.
As an Appetizer:
- Party platter: Arrange on a serving platter with decorative toothpicks for easy grabbing.
- Dipping station: Provide extra honey garlic sauce, sweet chili sauce, and spicy mayo for dipping options.
- Fusion nachos: Layer over wonton crisps with shredded cheese, green onions, diced red peppers, and a drizzle of sriracha cream.
Complementary Side Dishes:
- Vegetable sides: Asian slaw, cucumber salad, or garlic green beans
- Starches: Coconut rice, garlic fried rice, or sesame noodles
- Fresh options: Edamame, kimchi, or a simple mixed green salad with ginger dressing
Common Mistakes to Avoid
Even experienced cooks can run into issues when making this dish. Here are some common pitfalls and how to avoid them:
- Overcoating the chicken: Too much batter will create a thick, doughy coating instead of a light, crispy one. Shake off excess at each dredging stage.
- Crowding the pan: Frying too many pieces at once lowers the oil temperature, resulting in greasy, soggy chicken. Work in small batches for best results.
- Adding sauce too early: Tossing the chicken in the sauce too far in advance will make it soggy. If not serving immediately, keep the chicken and sauce separate until just before serving.
- Under-seasoning the coating: The flour mixture needs adequate seasoning to ensure flavorful chicken. Don’t be shy with the spices!
- Skipping the cornstarch in the sauce: This is essential for creating that thick, glossy sauce that coats the chicken perfectly. Without it, the sauce will be too thin and won’t adhere well.
Cost Breakdown
I know budget-friendly cooking is important to many of us, so here’s an approximate cost breakdown for this recipe (prices may vary based on your location):
| Ingredient | Approximate Cost |
|---|---|
| 1.5 lbs chicken breasts | $7.50 |
| Cornstarch | $0.50 |
| Eggs | $0.50 |
| Flour and spices | $0.75 |
| Vegetable oil | $1.00 |
| Honey | $1.25 |
| Soy sauce | $0.50 |
| Garlic and ginger | $0.75 |
| Other sauce ingredients | $1.25 |
| Garnishes | $1.00 |
| Total | $15.00 |
| Cost per serving (4 servings) | $3.75 |
Compare that to the $12-15 you might pay for a similar dish at a restaurant, and you can see the savings add up!
The Science Behind the Recipe
I’ve always been fascinated by the “why” behind cooking techniques, so let me share some interesting food science that makes this recipe work:
- Double dredging: The cornstarch creates a dry surface for the egg wash to adhere to, while the seasoned flour provides structure and flavor. This two-step process creates more surface area for a crispier texture.
- Cornstarch vs. flour: Cornstarch creates a crispier coating than flour alone because it inhibits gluten formation and has a higher gelatinization temperature.
- The thickening process: When cornstarch is heated in liquid, the starch granules absorb water, swell, and eventually burst, releasing amylose and amylopectin. These molecules create a network that traps water, thickening the sauce.
- Balancing flavors: The recipe achieves the perfect balance of the five basic tastes:
- Sweet (honey and brown sugar)
- Salty (soy sauce)
- Sour (rice vinegar)
- Bitter (slight bitterness from garlic)
- Umami (soy sauce and sesame oil)
Understanding these principles can help you make adjustments with confidence if needed.

Frequently Asked Questions
I’ve received many questions about this recipe over the years. Here are the most common ones, answered:
Q: Can I bake or air-fry these chicken bites instead of deep-frying?
A: Absolutely! For baking, preheat your oven to 425°F (220°C), place the coated chicken on a parchment-lined baking sheet, spray with cooking oil, and bake for 15-20 minutes, flipping halfway through. For air-frying, cook at 380°F (193°C) for 10-12 minutes, shaking the basket halfway through cooking. The texture won’t be identical to deep-fried, but it’s still delicious!
Q: Is there a gluten-free version of this recipe?
A: Yes! Simply substitute the all-purpose flour with a gluten-free flour blend and ensure your soy sauce is gluten-free (or use tamari instead). The cornstarch is already gluten-free, so no change needed there.
Q: Can I use chicken thighs instead of breasts?
A: Definitely! Chicken thighs tend to be more forgiving and stay juicier, making them an excellent choice. Just make sure to trim any excess fat before cutting into cubes.
Q: How can I make this recipe less sweet?
A: Reduce the honey to 1/4 cup and omit the brown sugar. You might want to add an extra tablespoon of soy sauce to balance the flavors.
Q: My sauce is too thin. How can I fix it?
A: Make an additional cornstarch slurry with 1 teaspoon cornstarch and 1 tablespoon cold water. Add it to the simmering sauce a little at a time until you reach your desired consistency.
Q: Can I use this sauce for other proteins like shrimp or tofu?
A: Absolutely! This sauce works wonderfully with shrimp (cook for just 2 minutes per side), firm tofu (press and cube before coating), or even cauliflower florets for a vegetarian option.
Q: How spicy is this recipe as written?
A: With 1/2 teaspoon of red pepper flakes, it has a mild to medium heat level that most people find enjoyable without being overwhelming. Adjust up or down to suit your preference.
Personal Touches and Final Thoughts
What began as my attempt to recreate a takeout favorite has evolved into a cherished recipe that brings my family together around the dinner table. There’s something special about watching faces light up when these honey garlic chicken bites make their appearance.
I encourage you to make this recipe your own. Perhaps you’ll add a splash of bourbon to the sauce for a grown-up twist, or incorporate some of your favorite spices into the coating. Cooking is about experimentation and finding what works for you and your loved ones.
One final tip from my kitchen to yours: As tempting as it might be to sample these bites right away, allowing them to rest for just a minute after tossing in the sauce lets the flavors meld and the coating set up perfectly. It’s worth the brief wait, I promise!
I hope this honey garlic chicken brings as much joy to your table as it has to mine. Happy cooking!
Q&A Section
Q: Can I make this recipe ahead for a party?
A: Yes! Fry the chicken up to 4 hours ahead and keep it uncovered at room temperature. When ready to serve, warm it in a 350°F oven for 10 minutes, then toss with freshly made sauce.
Q: My coating keeps falling off during frying. What am I doing wrong?
A: Make sure your chicken is completely dry before coating, and let the coated pieces rest for 5 minutes before frying. Also, don’t flip the chicken too soon—wait until a crust forms on the first side.
Q: What’s a good vegetarian substitute for this recipe?
A: Extra-firm tofu works wonderfully! Press it for 30 minutes, then cut into cubes. You can also try cauliflower florets or king oyster mushrooms for a meaty texture.
Q: Can I double the recipe for a larger crowd?
A: Absolutely! The recipe doubles easily—just make sure to fry in small batches to maintain oil temperature and crispiness.
Q: How can I tell when the oil is hot enough without a thermometer?
A: Drop a small cube of bread into the oil—it should turn golden brown in about 30 seconds when the oil is around 350°F. Alternatively, dip the end of a wooden spoon into the oil; if bubbles form around the wood, the oil is ready.
Q: My sauce crystallized and got too thick. How can I fix it?
A: This typically happens if the sauce is cooked too long or at too high a temperature. Simply reheat it gently with a tablespoon or two of water, whisking constantly until smooth again.
Q: What can I use instead of rice vinegar if I don’t have any?
A: Apple cider vinegar or white wine vinegar make good substitutes—just use a little less (about 2 teaspoons) and add a pinch of sugar to compensate for rice vinegar’s milder, slightly sweet profile.
Q: How do I know when the chicken is fully cooked?
A: The safest method is to use an instant-read thermometer; chicken is done at 165°F (74°C). Without a thermometer, cut into a larger piece—the meat should be opaque with no pink remaining.